You are using an out of date browser. It may not display this or other websites correctly.
You should upgrade or use an alternative browser.
You should upgrade or use an alternative browser.
Fenerbahce Kit PES4 PS2
- Thread starter serhat09
- Start date
Mumpleaser
Dirty_Harris Manager
Here you go serhat09!
Home

Away

GK Home

GK Away

All courtesy of the great kitmaker Kel!
Home
Away
GK Home
GK Away
All courtesy of the great kitmaker Kel!
Zygalski
Administrator
Guide for WE8 but same principles for PES4. Use the DATA_E.AFS instead of the DATA_J.AFS and PES4.iso instead of WE8.iso.
IceMan_Bergkamp said:Inserting Kits in WE8
Inserting Kits in WE8.
I have decided to do this since I had time at work! J
1) First thing you need to do is make an iso image of the original DVD on your machine. What I use is ISOBUSTER.
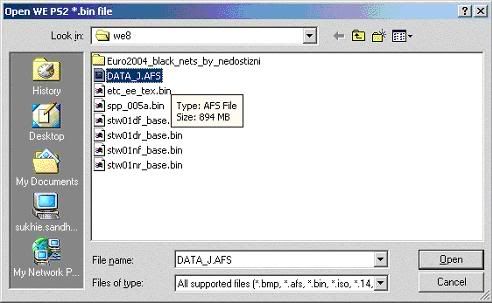
2) Once ISOBUSTER has created the image, right click on DATA_J.AFS and choose to extract it from the WE8.ISO image. Save this on your pc.
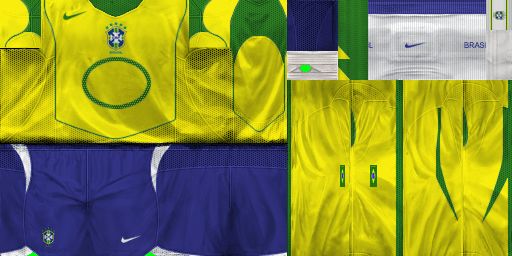
3) Now you need a bmp. I have decided to use Sparks new Brazil home shirt
4) Easiest way to insert the kit is using Obocaman’s WE PES Graphic Studio tool. You can use the search, as there is a link to the download this tool on this site.
5) Once downloaded, you need to know the uni number for Brazil kit. There are threads on this site where users have posted the uni numbers. Therefore, by looking at these, you’ll see that Brazil is “44”.
6) Kits are separated into 4. You’ll have:
Uni044ga.bin = Home keeper
Uni044gb.bin = Away keeper
Uni044pa.bin = Home player
Uni044pb.bin = Away player
7) Therefore, you’ll see that we want to insert the Brazil home shirt. Therefore, we must navigate to this file in DATA_J.AFS.
8) To do this, Start up the Graphic Studio tool, and then CLICK FILE and then OPEN from the menu.
9) Navigate to the DATA_J.AFS on your PC and CLICK “OPEN”.
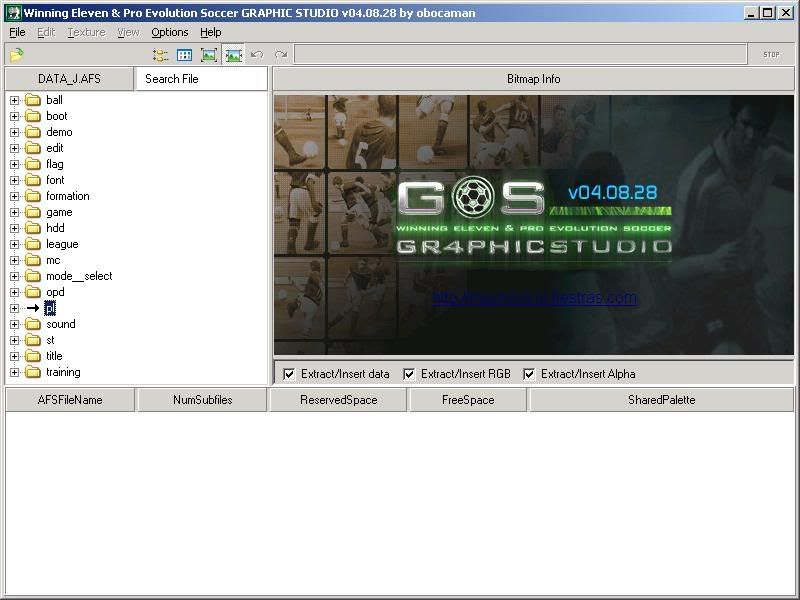
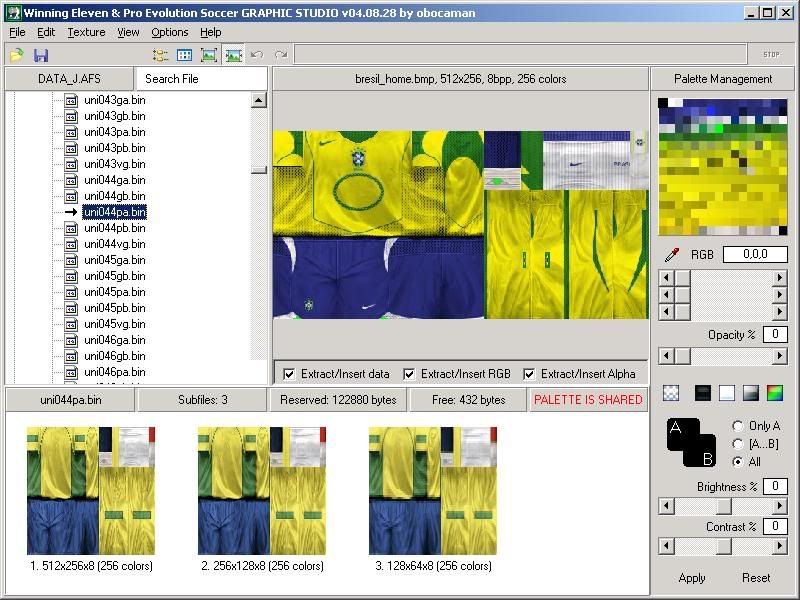
10) You should see the following screen:
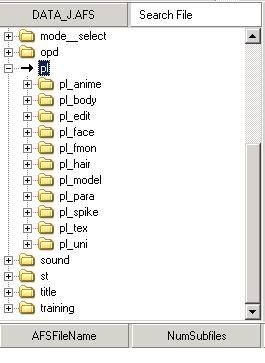
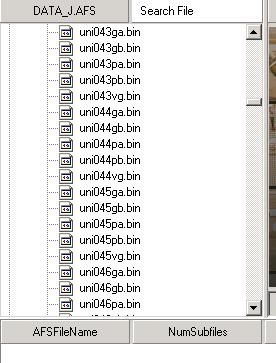
11) Now Navigate to the “PL” folder as shown above and Expand it. You should see the following options in the left hand window:
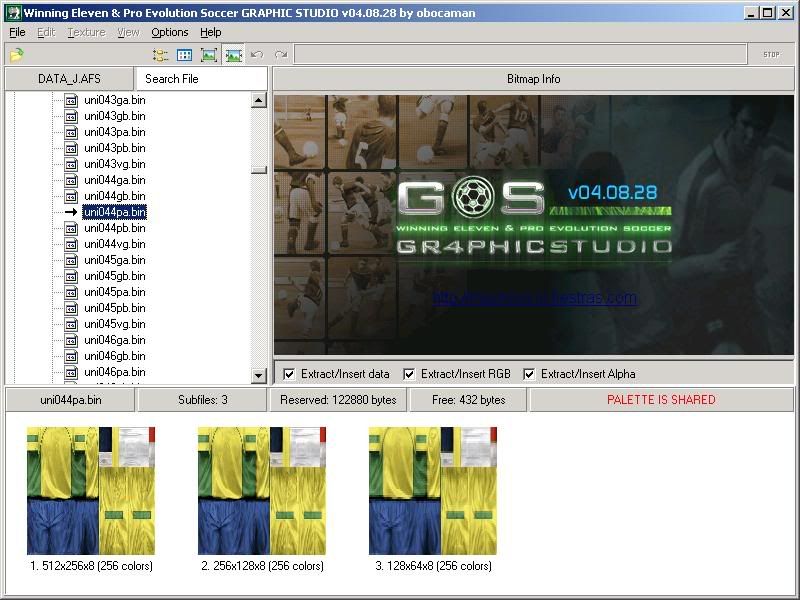
12) Expand the last folder, pl_uni and then you should see all the list of uni files. Navigate to uni044pa.bin. You should see the following screen with looking for the Uni file:
13) Click on uni044pa.bin. You should see the following screen:
14) Right-Click in the window that says Bitmap info, and you’ll see the following screen:
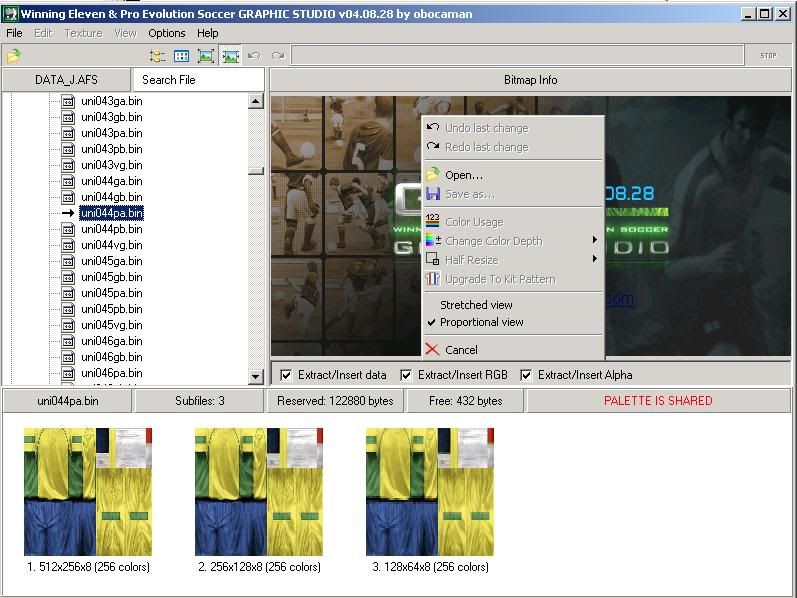
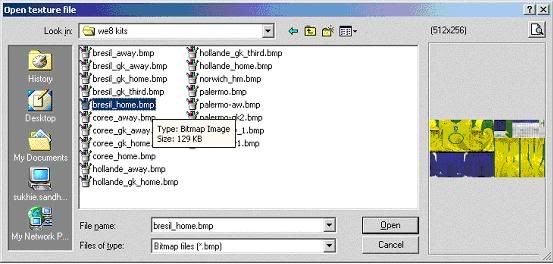
15) Choose OPEN from that menu, and then a Open Texture File window opens. Navigate to the saved kit bitmap and click OPEN:
You should see the following screen:
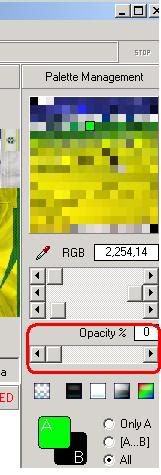
16) Now you need to set the transparency. To do this, You need to click on the Set Opaque button:
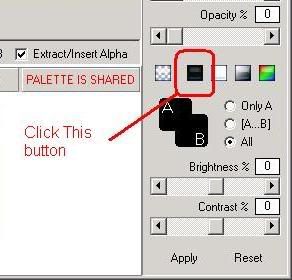
17) You’ll see the following change after pressing the opaque button:
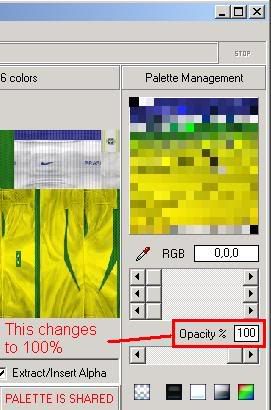
18) Now you’ll notice that there is a fluorescent green colour in the palette. This is used in kits for shaping collars, the cut in the bandage etc, and is normally made transparent so that it becomes “invisible” in game. Some kit makes may use a fluorescent pink or yellow as well.
19) Now click on the fluorescent green colour in the palette
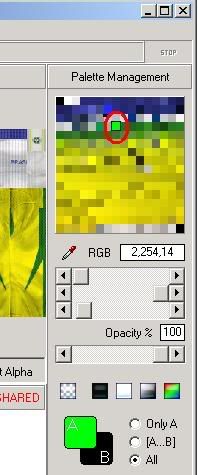
, and set it to 0%.
19) You now need to drag and drop the image. Now Left Click and hold the mouse button and Drag the image over to the 1st little image and let go of the mouse button:

20) You should see the following image:

As you can see, your kit is now in the data_j.afs.
That is it!
21) Now open Apache tool, and open the we8 iso, and import your updated DATA_J.afs with the kit(s) you have added back into the ISO.
Once that is done, burn you image and enjoy your kits!
Special Thanks to Spark for his Brazil home shirt that was used in this tuturial.
joe_king
Registered User
This is what i was looking for. Now, i have completed the download of Jonboyo's patch. Although, i wish to edit some of th kits within the patch. Just need a few things cleared up.
The programs I need. I obviously need Obocaman’s WE PES Graphic Studio tool after reading through the post, which i will download. But, i have made a PES4.ISO using DVD Decrypter. Does it matter?
I don't understand where to find and extract the DATA_E.AFS. Can i do this using DVD Decrypter or do i need ISO Buster?
Do i put the patch onto the ISO first?
So basically, can you give me some simple steps of editing the kits on the patch. Thanks.
Thumbs Up
Perfect Tutorial ...
Now I gotta try this ... Yesterday I've downloaded World Cup 2010 kits for PES 4 / WE8 International, but I was having problems importing the kits with Graphic Studio probably this is what I needed, to play with the Opaque and Transparency buttons ... Well I will give it a shot .
I will post some pictures if I successfully did it right .
-----
Thumbs Up Winning Eleven 8 International Ps2 Revived ! :w00t
Last edited: